
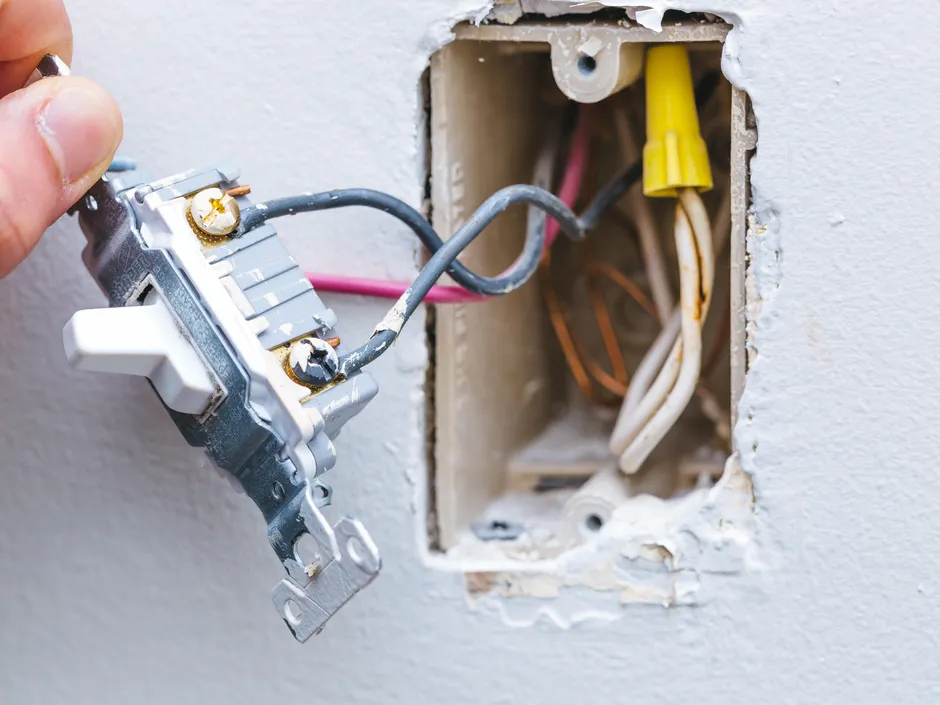

One of the more common and confusing electrical issues we see when selling houses is a non-functioning 3-way or 4-way switch. Symptoms include the light not working when switched on, or it working part of the time when one switch is in a certain position. The first step in fixing the problem is identifying what type of circuit you are dealing with and investigating how it is wired.
Disclaimer
If you are not comfortable working with electricity, have never worked with it, or don’t understand the safety aspects of working with it when power is either on or off, then don’t try this at home.
Power should always be turned off at the service panel when removing or attaching wires, or touching the conductors with your hand.
If you need to work with the power on so that you can measure voltages, then always work with rubber-soled shoes, don’t work in wet conditions, don’t lean against the wall or any grounded objects, and work with one hand so that you don’t provide a ground path through your two arms, as this could cause electricity to traverse your core and stop your heart.
Is it a 3-way or a 4-way circuit?
If your light setup is designed to operate with just two switches, then it is a 3-way circuit. If it has more than two switches, then it is a 4-way circuit. 3-way circuits use two 3-way switches. A 4-way circuit also uses two 3-way switches, and one or more 4-way switches in between. All additional switches above the two 3-way endpoint switches must be 4-way switches. The endpoints are the 3-way switches. One endpoint receives power from the service panel and the other is connected directly to the load (light). So before you buy a new switch, you need to know whether you need a 3-way switch or a 4-way switch.
Identifying a 3-way or 4-way Switch
A typical 3-way and 4-way switch are shown below. The 3-way switch will have three screws in addition to a green ground screw, and the 4-way switch will have 4-screws plus a green ground screw. A normal light switch will only have two screws plus the ground.
On modern 3-way or 4-way switches, the screws will be brass and black. On the 3-way switch, the single black screw indicates the common screw where either the line power or the load is attached. The brass screws are for the traveler wires.
On a typical 4-way switch, there will be two black and two brass screws. Usually the two black screws would connect to the traveler wires of one 3-way endpoint, and the two brass screws would connect to the traveler wires on the second 3-way switch.
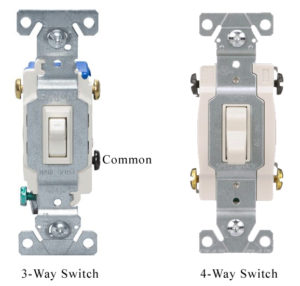
Figure 1 – 3-way and 4-way Switches
Wiring a 3-Way Switch
Wiring a 3-way switch is not difficult. See the diagram below. There is a power wire from the service panel that carries 120V. It will be black and accompanied by a white neutral wire. The black wire connects to the common screw, usually the black screw, or sometimes the single screw on one side of the switch, or the screw marked as “Common”.
Then there is a load wire that goes to the light. It will also typically be black and be accompanied by a white wire. The black wire will connect to the black screw on the second switch. The ends of this pair of wires is usually the light fixture.
Two traveler wires will connect the two brass screws on one switch to the two brass screws on the second switch. These traveler wires will typically be black and red, but they could also be black and white, or red and white.
The traveler wires work together to connect power between the two common screws, depending on the position of the two toggle switches. If wired normally, power to the light should be off when both switches are in the down position or both switches are in the up position. If one switch is up and one switch is down, then the light should be on.
Synchronizing the Switches
To synchronize your switches so that both switches are in the down or up position when the light is off, toggle them both down. If the light is on instead of off, then either swap the position of the traveler wires on one switch only, or just simply rotate one of the switches 180 degrees.
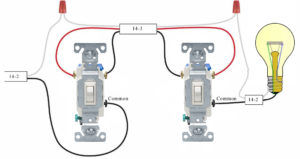
Figure 2 – Proper 3-Way Wiring
Demonstration of 3-Way Operation
The following animation shows a 3-Way circuit operation. Red indicates that the wire path is hot. If the path between the line power and the light is broken, then the entire path will not show red and the light will not switch on. Black indicates that voltage is not present. The neutral side will always be black as it is tied to ground.
Figure 3 – Operation
Troubleshooting a 3-Way Circuit
Always disconnect power when working on electrical circuits unless you are testing and plan on not touching anything with your bare hands.
A 3-Way circuit has a few failure modes.
- The light bulb may be bad.
- A circuit breaker may have tripped.
- A switch may be bad.
- A wire may be loose.
- An incorrect switch may be installed.
- The circuit may be miswired.
If the light worked originally and no work had been done on it, then it probably wasn’t miswired. Check the bulb, check the circuit breaker, and look for loose wires. If you just bought the house or if somebody just worked on the circuit, and the circuit breaker and light bulb are fine, then verify that both switches are 3-way and that they are wired as shown above.
If you find a bad switch, make sure you buy a 3-way and not a 4-way or standard light switch. Make sure there aren’t two dimmers on the same 3-way circuit unless they are specifically allowed to work together.
Loose wires are fairly common issues, as well as somebody trying to use a regular switch or a 4-way switch in place of a 3-way switch.
Wiring a 4-Way Circuit
A 4-Way Circuit is a 3-way circuit with one or more 4-way switches installed in between to act as additional switch locations. A 4-way circuit will never have more than two 3-way switches, but can have many 4-way switches. In a simple 4-way circuit where there is just one 4-way switch, the two traveler wires from one 3-way switch connects to the black terminals of the 4-way switch, and the two traveler wires from the second 3-way switch. Figure 4 shows the configuration.
Essentially the power enters the configuration at the common screw at one 3-way endpoint, and leaves the configuration at the common screw at the second 3-way endpoint. The traveler wires ensure that the switches are configured is such a way that the light toggles on and off when any switch is toggled on and off. The switches act together as a single switch with multiple toggle points.
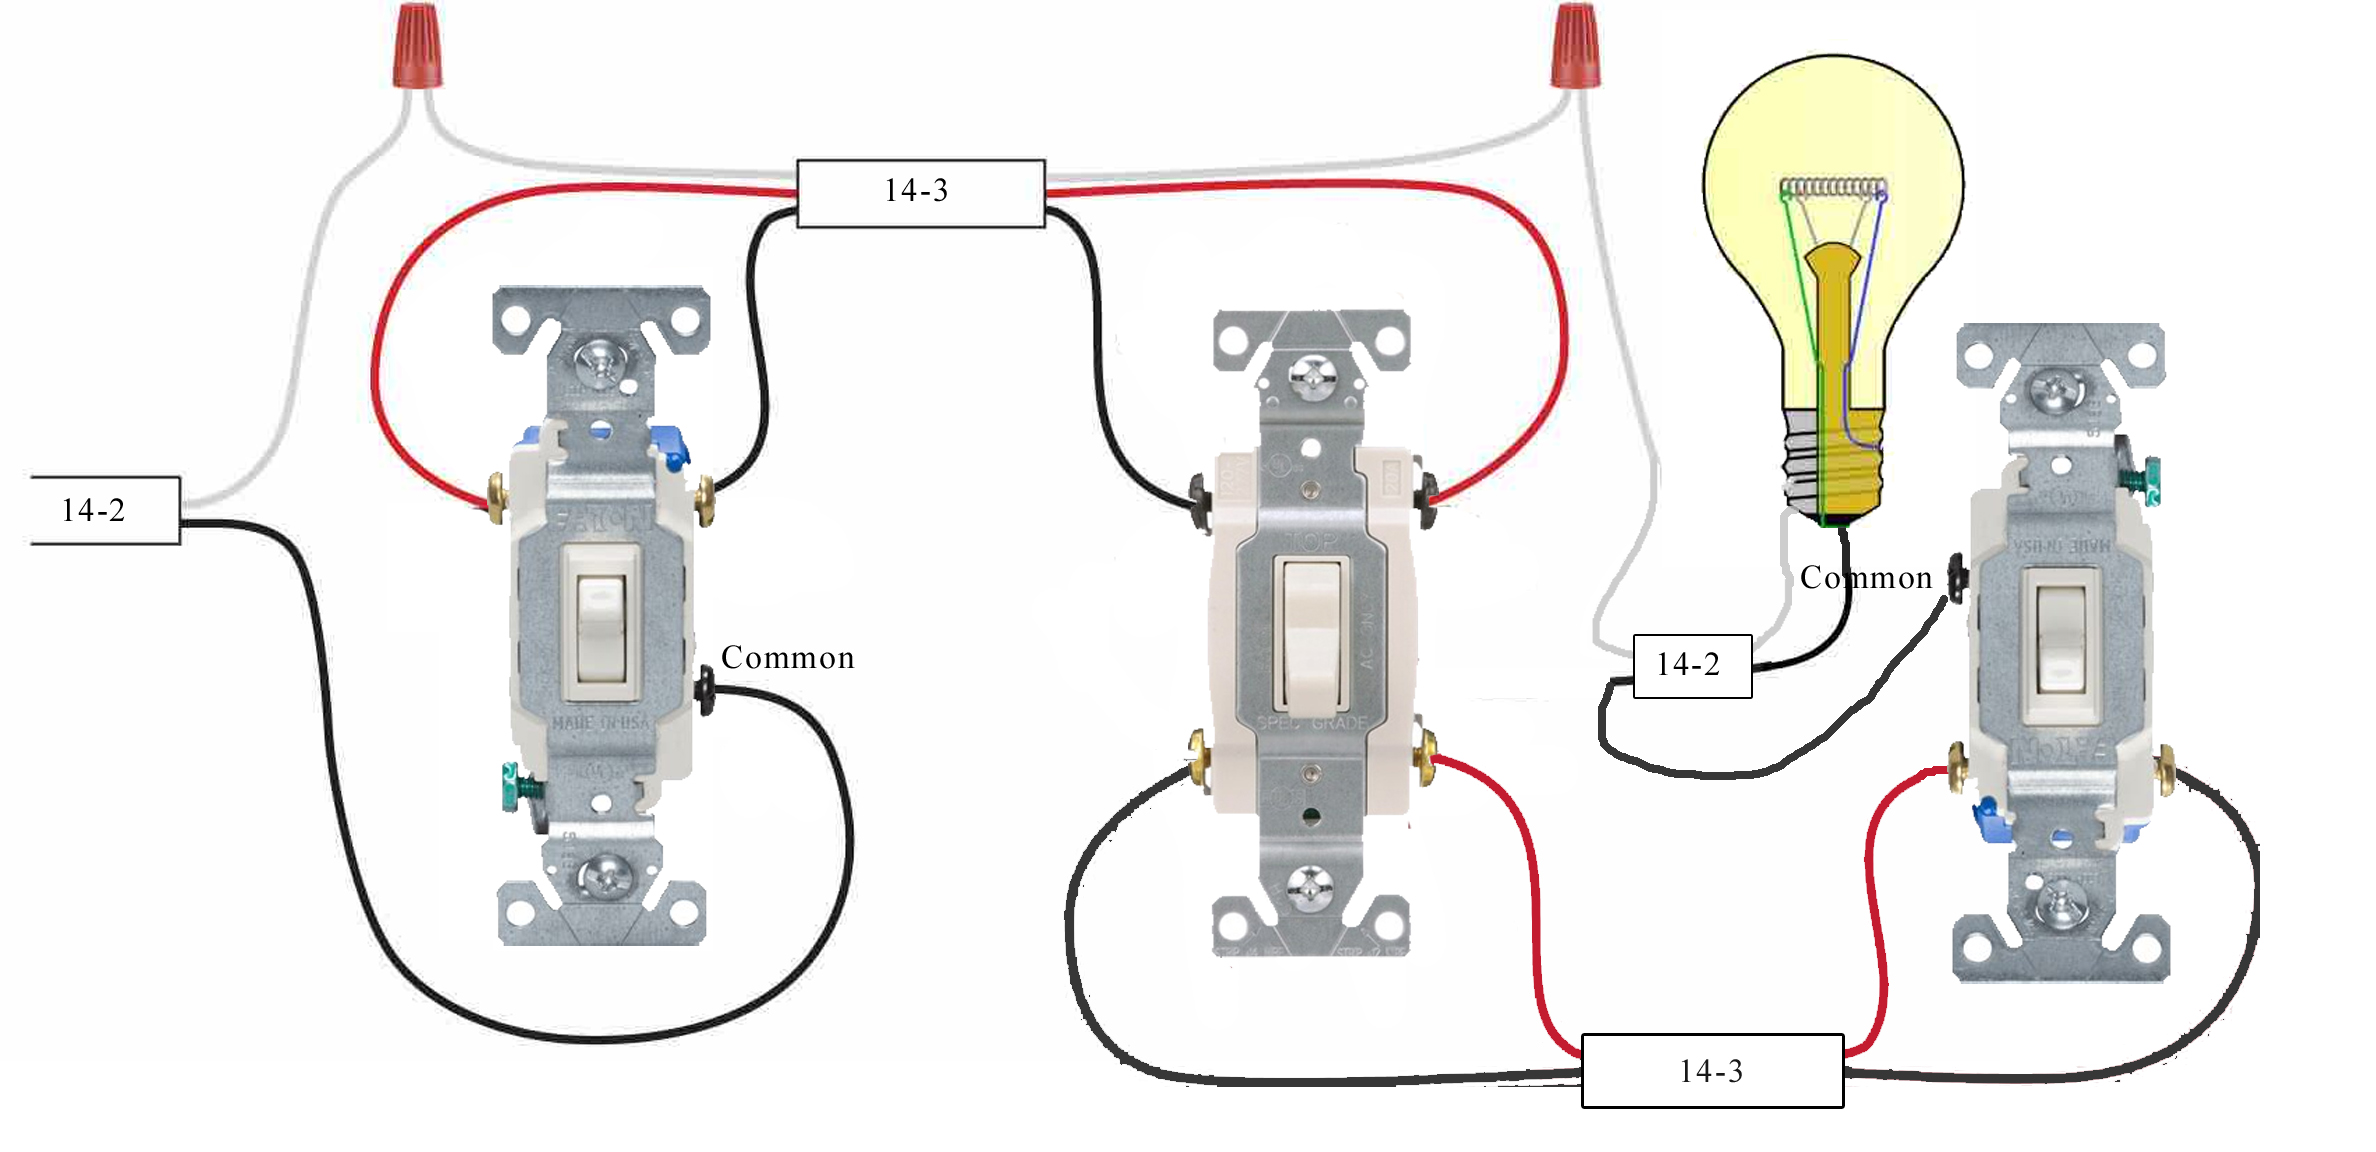
Figure 4 – Proper 4-Way Wiring
Demonstration of 4-Way Operation
The following animation shows a simple 4-Way circuit operation. Red indicates that the wire path is hot. If the path between the line power and the light is broken, then the entire path will not show red and the light will not switch on. A black line indicates that voltage is not present due to an open circuit created by the switch. The neutral side will always be black as it is tied to ground.
Figure 5 – 4-Way Circuit Operation